

Stardew Valley Best Layout for Farm Efficiency: 10 Pro Designs That Actually Work
Ever sprinted across your own farm at 6 AM just to water everything, feed the chickens, and grab fruit before you run out of energy? Yeah, I've been there. That's exactly why the Stardew Valley best layout for farm efficiency matters so much. It isn't about aesthetics. It's about not wasting your in-game mornings on nonsense.
I've put probably close to 500 hours into Pelican Town by now. I used to water crops by hand until noon every single day. Then I sat down and actually planned my sprinkler grids. My morning routine collapsed from 4 hours to under 1. That's the difference a real layout makes. Below are 10 pro farm designs built on actual game mechanics — sprinkler ranges, scarecrow coverage, Junimo Hut zones, animal grazing tricks. No mods. No weird custom maps. All of this works in vanilla.
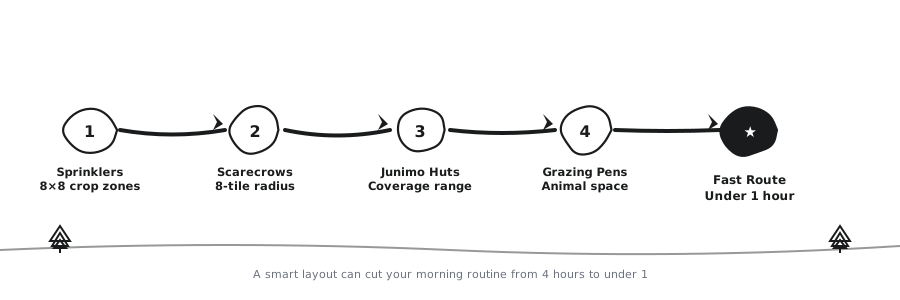
Why Your Farm Layout Matters More Than You Think
How you lay out your farm directly controls how much time you burn every single day. Messy farm means you're constantly running back and forth across the map. Tight layout means you finish chores by 9 AM and still have the whole day left for mining or fishing or cranking out kegs.
The Standard Farm map wins for efficiency, hands down. It has over 3,400 tillable tiles of open dirt. Other maps look great on paper — Forest, Riverland, Hilltop — but they steal crop space and force you to walk farther.
The Three Core Rules of Farm Efficiency
- Less walking equals more profit. Every tile you cross eats game time. Time spent shuffling around is time you could be making money.
- Sprinklers come first. Quality Sprinklers handle 8 tiles each. Iridium Sprinklers cover 24. Once you're past Year 1, hand watering is just throwing hours away.
- Scarecrows are non-negotiable. A regular Scarecrow covers a 17x17 square. A Deluxe Scarecrow covers 33x33. Crows will wreck unprotected crops overnight if you let them.
What You Need Before Building
- Farming Level 6 — Quality Sprinklers unlock here (needs Copper Bar, Iron Bar, Refined Quartz)
- Farming Level 9 — Iridium Sprinklers become available (Gold Bar, Iridium Bar, Battery Pack)
- Silos — build one or two so hay is always stocked
- Paths — Stone Path or Cobblestone Path works for marking zones
Heads up if you're new: don't go nuts planting a giant field before sprinklers exist. Hand-watering a huge patch sounds fine in theory until you're standing there at 2 PM with a watering can.
Same deal with scarecrows — don't wait until after you've planted. Crows can come for unprotected crops the very first night. Put them down first.
And for the love of Junimos, leave room around trellis crops. If you box yourself in, you literally cannot walk through your own field.
Stardew Valley Best Layout for Farm Efficiency: 10 Pro Designs
These are the ten layouts I cycle through depending on where my save is.
Design 1: The Quality Sprinkler Starter Grid
Early game, keep it dead simple. 3x3 blocks, Quality Sprinkler right in the middle.
- Hoe out a 3x3 dirt patch.
- Drop the sprinkler in the center tile.
- Plant 8 crops around it.
- Leave a 1-tile path between blocks so nothing is unreachable.
Best crops: Parsnips, Potatoes, Strawberries.
Design 2: The Iridium Sprinkler Mega Plot
Hit Farming Level 9 and you're basically required to switch. Each Iridium Sprinkler waters 24 crops across a 5x5 square.
- Hoe a 5x5 dirt patch.
- Center the Iridium Sprinkler.
- Fill in 24 crops around it.
- Connect blocks with 1-tile paths.
Best crops: Blueberries, Cranberries, Starfruit.
Design 3: The Junimo Hut Auto-Harvest Field
Junimo Huts are what I'd call a true game changer. Anything planted inside a 17x17 square around the hut gets harvested automatically.
- Unlock them by finishing the Community Center.
- Set the hut in the middle of your biggest field.
- Pack Iridium Sprinkler blocks around it.
- Ring the outer edge with Scarecrows.
Once those little green guys are working, you can literally fish at the beach while your farm picks itself. I tried going back to manual harvesting once and hated every second of it.
Pro tip: Pair Junimo Huts with Ancient Fruit and your farm basically runs itself.
Design 4: The Ancient Fruit Wine Money Machine
Ancient Fruit is the laziest high-value crop in Stardew. It takes 28 days to mature, then produces fruit every 7 days forever. Turn that fruit into wine and you're printing money.
- Plant Ancient Fruit across a big Iridium Sprinkler field.
- Drop Junimo Huts in to auto-harvest.
- Stuff Large Sheds with Kegs. You can fit about 137 Kegs in one Large Shed, which is absurd.
- Put the keg shed right next to the field.
Ancient Fruit Wine sells for 1,650g normally. With the Artisan profession, that jumps to 2,310g a bottle. This is what endgame runs are built on.
Design 5: The Trellis Tunnel for Hops and Beans
Hops, Green Beans, and Grapes all climb trellises. You can't walk through them, so spacing is everything.
- Plant trellis crops in straight rows.
- Leave a 2-tile path between row pairs.
- That gap is what lets you stand and harvest without getting stuck.
Best pick: Hops. They produce every single day after they mature, and Pale Ale sells for 420g with Artisan. Hops are the summer crop you don't skip.
Design 6: The Barn and Coop Grazing Zone
Animals need grass. They also devour grass at a terrifying rate. The fence-post trick solves this.
- Build a fenced area near your Deluxe Barn and Deluxe Coop.
- Scatter Grass Starters inside the pen.
- Set fence posts directly on top of some of the grass starters.
- The grass under the fence can't be eaten, so it keeps spreading outward.
I've used this trick for seasons straight. My animals stay fed the whole time and I barely buy hay from Marnie anymore.
Design 7: The Fruit Tree Orchard Pattern
Fruit trees are slow but steady earners. Each one needs a clean 3x3 area to actually grow.
- Plant each tree with at least 2 empty tiles on every side.
- Run paths outside the 3x3 zone to mark rows.
- Mix up the seasons: Apricot and Cherry in spring, Peach and Orange in summer, Apple and Pomegranate in fall.
Warning: Nothing goes inside the 3x3 growing zone. Paths, fences, even extra grass — any of it stops the tree from growing.
Trees take 28 days to mature. Once they do, they drop one fruit per day during their season.
Design 8: The Tapper Tree Lines
Kegs need Oak Resin. And I mean a lot of it. So grow your own oak forest instead of buying it.
- Plant oak trees in rows.
- Keep 1 tile between trees.
- Tapper every mature one.
- Run a path behind the row so you can collect without getting wedged.
Pro tip: A grove of 15-20 tapped oaks is enough to feed a real keg operation.
Design 9: The Seasonal Rotation Quadrants
Split your main field into 4 equal chunks. Rotate crops each season.
- Use paths to carve the field into 4 quadrants.
- Put a different crop in each quadrant.
- Spring: Parsnips, Potatoes, Cauliflower, Strawberries.
- Summer: Blueberries, Starfruit, Hops.
- Fall: Cranberries, Pumpkins, Sweet Gem Berry.
Staggered harvests mean you never wake up on a Tuesday with zero income coming in.
Design 10: The Full-Farm Integrated Master Plan
This is the endgame dream. Every square of the farm has a job.
- Middle zone: Big crop field with Iridium Sprinklers and Junimo Huts
- Left zone: Barn, Coop, grazing pen
- Right zone: Fruit tree orchard and oak tapper grove
- Bottom zone: Sheds stuffed with Kegs, Preserves Jars, storage chests
The whole point is to keep every production chain short. I harvest fruit, walk maybe 5 tiles into the keg shed, drop it in a keg, walk back out. Nothing needs to travel more than about 10 tiles to get where it's going.
Step-by-Step: Build the Stardew Valley Best Layout for Farm Efficiency
This is the exact order I build in when I start a new save:
- Clear the land. Chop trees, break stones, pull weeds. Keep the big stumps if you want them later, or remove them.
- Lay down permanent paths. Paths are cheaper to relocate than buildings, but planning first still saves headaches. Sketch out fields, animal zones, sheds.
- Silo first. Hay storage is cheap and you'll need it before you know it.
- Coop and Barn next. Tuck them on the left or right side of the farm, not in the middle.
- Quality Sprinkler blocks. Start with 8 crops per sprinkler and scale up.
- Scarecrows go down BEFORE planting. One Scarecrow covers 17x17 tiles.
- Upgrade to Iridium Sprinklers at Farming Level 9. Your crop count per sprinkler basically doubles.
- Junimo Huts after the Community Center. Free labor forever.
- Ancient Fruit seeds the second you get them. The Traveling Cart, Mutant Bug Lair, and Seed Makers are all sources.
- Keg shed right next to the field. Keep the chain tight.
Common Mistakes That Kill Your Farm Efficiency
Mistake 1: Planting trellis crops in a solid block. Fill a big area with Hops or Beans and you will trap yourself inside. Leave 2-tile paths between trellis rows, every time.
Mistake 2: Skipping scarecrows. Crows eat crops in unprotected patches. One regular Scarecrow covers a 17x17 square — spread them evenly and you're golden.
Mistake 3: Barns and coops miles from the house. You have to pet those animals every day, especially early on. Long walks add up fast and steal your mining time.
Mistake 4: Forgetting Junimo Hut range. The hut only harvests crops inside its 17x17 zone. Anything outside still needs you to hand-pick it.
Mistake 5: Paths inside the fruit tree 3x3 zone. Fruit trees need a completely clear 3x3. One object in there and growth stops.
Mistake 6: Too many silos. Two silos hold 480 hay. That's more than enough for winter. Use the extra space for crops or sheds.
FAQ: Stardew Valley Best Layout for Farm Efficiency Questions
Q: What is the Stardew Valley best layout for farm efficiency in Year 1?
A: Stick with Quality Sprinkler grids in 3x3 blocks. Grow Parsnips, Potatoes, and Strawberries. Put one regular Scarecrow down per 17x17 area. Once you hit Farming Level 9, upgrade to Iridium Sprinklers.
Q: How many scarecrows do I need for a large crop field?
A: One regular Scarecrow covers a 17x17 square, which is 289 tiles of crops. One Deluxe Scarecrow covers a 33x33 square. For a typical field, 2-4 Scarecrows is usually enough.
Q: Are Junimo Huts worth using?
A: Absolutely. They harvest crops in a 17x17 area automatically and save you hours of picking every season. Pair them with Ancient Fruit and you've got the most passive, profitable farm layout in the game.
Q: Is Ancient Fruit or Starfruit better for an efficient farm?
A: Ancient Fruit wins on efficiency. It grows once and produces every 7 days all year. Starfruit wine sells for more per bottle (3,150g with Artisan) but you have to replant every single cycle, which burns time and seeds.


