

Why This Baldur’s Gate 3 Act 1 Guide Won't Steer You Wrong
Act 1 is massive. You're bouncing between the Wilderness, the Underdark, and the Shattered Sanctum before Moonrise Towers even crosses your mind. This guide walks you through the critical quest path, every major boss, and the best gear spots that'll actually carry you into the later acts. Saving the grove? Butchering the goblins? Building an absurdly overpowered party before Act 2? You're in the right place.
I'll take you through the main quests in a sensible order, give you tactics that work without hand-waving, and point out exactly where to find armor and weapons that change how the game plays. No filler. Just the routes and loot that actually matter.
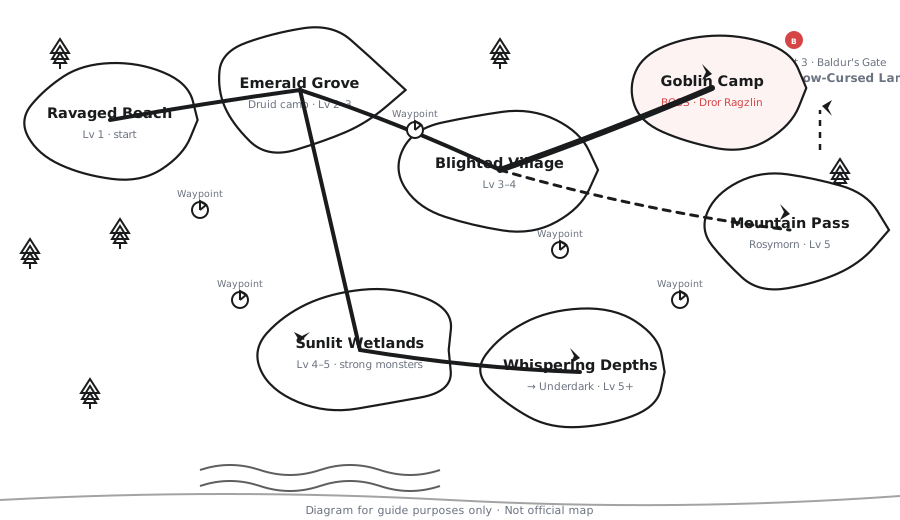
Act 1 Quest Structure: What to Do First
Act 1 isn't on rails, but a smart order saves you from hours of backtracking and missed content. Your big goal is reaching the Mountain Pass or Grymforge after you've sorted out the goblin situation. Use this checklist as the skeleton:
- Land on the beach – Reunite with your companions, grab Shadowheart, and loot the crates near the Nautiloid crash.
- Activate the Emerald Grove – Talk to Zevlor, poke around the druids, and decide whether to expose Kagha.
- Clear the Goblin Camp – Knock out three quests inside the Shattered Sanctum: kill Priestess Gut, Minthara, and Dror Ragzlin.
- Handle the Underdark – Drop in through the Defiled Temple or the well in the Blighted Village. Help the myconids, deal with Nere, and take a boat to Grymforge.
- Exit to Act 2 – Take the Mountain Pass (optional boss fight) or the elevator at Grymforge after Nere is done.
Important: In early Baldur's Gate 3, leveling beats gear. Grind side quests like Save the Goblin Sazza and Find the Missing Shipment until you hit level 4 before tangling with the goblin leaders. A level 3 party vs. three bosses is just a slow, painful wipe.
New player warning: Don't speedrun the main story here. Act 1 is stuffed with side content that feeds you XP and loot, and if you blow past it you'll walk into Act 2 underleveled and get wrecked. Save before talking to anyone important. Dialogue choices lock you out of questlines all the time, and the game won't warn you.
Major Quests in Act 1 – Step by Step
Save the Emerald Grove
This one runs through most of Act 1. Don't rush the final confrontation. Cleanest path:
- Enter the grove, talk to Zevlor, then speak with Nettie in the druid chamber.
- Investigate Kagha's chest – head to the swamp and find the Shadow Druid's note.
- Confront Kagha. Pass a Persuasion check (DC 15) to turn her against the Shadow Druids, or just attack her.
- Side with the tieflings or the druids – this locks the grove questline.
Pro tip: Burn through all the trade dialogue with Dammon before the goblin raid kicks off. Once the grove locks down, his best armor is gone forever.
Find the Githyanki Warrior
Follow Lae'zel's story for a bit, but the real prize is the Mountain Pass. You don't have to fight the Githyanki at the bridge early. Learn about the creche, scout the area, and move on. Come back around level 6 when you're not made of paper.
The Goblin Camp – Three Bosses
The Shattered Sanctum is the hub. Sneak in through the side break in the wall (near the ogres) so you don't have to fight every goblin at the gate. Order matters here:
- Priestess Gut – She'll try to recruit you. Let her walk you to her private room, then jump her there. She's alone, so 4v1 is trivial. Use silence or burst her down before she can call help.
- Minthara – Scariest melee hit in the camp. Clear the room before you talk to her. Open from the overhead walkway with ranged attacks, then drop a Web or Grease bottle at the ladder so her goons crawl up slow.
- Dror Ragzlin – Do not let him summon the Mind Flayer. Hit him from the rafters above his throne. Misty Step around to reposition and dodge his Warhammer slams.
Reward: Every dead goblin leader drops loot, but the real prize is the quest completion from Zevlor – you get better prices at the Grove and a Worg Fang Amulet for clearing the trio.
New player warning: If you're still level 3, don't even walk into the goblin camp. Those bosses hit like trucks and the adds pile up fast. Go knock out the Blighted Village quests and grab a couple levels. Trust me, you won't regret the detour.
Rescue the Gnome and Find Nere
This Underdark quest runs on a timer. Enter Grymforge, free the gnomes, then fight Nere after he blows up the rubble. Bring someone with Sleep or Hold Person. Nere is a level 5 warrior with chunky AC, so lean on Magic Missile (auto-hit) and shove him into lava if you get the angle.
Boss Tactics for Act 1 – Don't Fight Fair
Baldur's Gate 3 rewards prep more than any game I've played. Every Act 1 boss has a weakness you can exploit before combat even starts. Quick reference table:
| Boss / Enemy | Level | Recommended Strategy | Position Advantage | Loot to Grab |
|---|---|---|---|---|
| Priestess Gut | 3 | Isolate her in her quarters; silence or burst damage | Her bedroom door blocks line of sight | Spellsparkler (staff) |
| Minthara | 4 | Attack from high ground; block her ladder with grease | Overhead walkway in the sanctum | Spidersilk Armour |
| Dror Ragzlin | 4 | Kill him before he summons; use force damage to push off throne | Rafters above the main hall | Helmet of Autonomy |
| Auntie Ethel | 5 | Focus Ethel first; lure her Mayrina illusions away | Fog cloud room edges | Masks of Power (sellable) |
| Phase Spider Matriarch | 5 | Destroy her egg sacks first; use Web immunity on tank | Bridge area, throw her off the ledge | Sword of Screams |
| Grym (Adamantine Forge) | 8 | Use the forge hammer – two hits kill him; lure onto the platform | The forge platform levers | Adamantine Armor set |
| Nere | 5 | Hold Person then focus fire; disable his shield | Rubble corridor bottleneck | Adamantine Helm |
Golden rule: Terrain is your best weapon in Baldur's Gate 3. Cliff smashes, bridge collapses, lava shoves – these win fights that would otherwise TPK you.
Another warning: Don't face-tank Auntie Ethel without a way to break your party out of fear or charm. Her illusions eat your turns, and a couple bad rolls flip the fight. Bring Calm Emotions or just nuke her before the madness starts.
Best Gear Locations in Act 1 (Hidden & Overlooked)
You don't need to loot every barrel. Just grab these high-impact items. Some are stupidly easy to miss without the right route.
Best Armor Locations
- Spider's Silk Armour – Dropped by Minthara. Light armor with advantage on Dexterity saves and Spider Climb. Rogue or catnip for monks. It's in her inventory after the goblin fight.
- Adamantine Scale Mail – Forge it at the Adamantine Forge in Grymforge. Needs one Mithral Ore (two exist in the area) and the Scale Mail mold. Gives you Reaper's – a boon that cuts incoming critical hits. Do this before fighting Grym; the forge fight is way easier once you know the lever timing.
- Grove's Druid Ritual Armor – Finish the Druid Grove ritual without killing Kagha. Talk to Kagha after exposing the Shadow Druids, then grab the hidden chest outside the stone circle. Contains a +1 scale mail with a nature bonus.
Best Weapon Locations
- The Sword of Screams – Hidden in the Phase Spider Matriarch's lair. Jump across the southern ledges with a Strength character. This shortsword chips extra psychic damage on hit. Stick it on a rogue or fighter.
- The Blood of Lathander – Technically in the Mountain Pass, but you can snag this legendary mace right at the end of Act 1. You'll need the Dawnmaster's Crest from the monastery. The mace throws a blinding light aura and heals you when you kill undead. Absolutely disgusting against Act 2's shadow curse.
- The Returning Pike – Sold by Grat the Trader in the goblin camp. A thrown weapon that boomerangs back to your hand every time. Give it to a high-Strength barbarian. Buy it before you start slaughtering goblins, or Grat dies and the pike vanishes with him.
Accessories that Carry You to Act 2
- Khalid's Gift – Necklace giving +1 Wisdom and a bonus on Wisdom saving throws. Found in the burning house in Waukeen's Rest behind a locked door. Clerics love this.
- Worg Fang Amulet – Reward for dropping the three goblin leaders. Advantage on Animal Handling and +1 to Intelligence checks. Not a combat piece, but handy for dialogue rolls.
- Mistral Armor's Gloves – Pickpocket them from the drow merchant near the Decrepit Village. Grant 1d6 fire damage on weapon attacks. Tiny early-game DPS boost that adds up.
Act 1 Exploration Pitfalls – Avoid These Mistakes
Players burn hours in Act 1 on avoidable traps and missed content. Keep these in your back pocket:
- Don't enter the Mountain Pass early – The level jump is cruel. Clear all the Underdark quests first, then walk in at level 6.
- Don't skip the creche – The Githyanki creche (Rosymorn Monastery) hides one of the best gloves in the game, the Gloves of Hill Giant Strength. You can clear the creche before Act 2 if you ambush the Githyanki patrol carefully.
- Handle the owlbear cub carefully – If you kill the owlbear mother, check the cave behind her nest. You can tame the cub later for a camp follower. Don't kill the cub – it's a simple animal handling roll.
- Use short rests generously – Act 1 has enough supplies to sustain two short rests per long rest. Burn them after every rough fight to save spell slots.
Underdark vs. Mountain Pass: Which Route Should You Take?
Act 1 shoves a big choice in your face. Both routes work, but they reward different playstyles. Here's the breakdown:
| Route | Level Scale | Best For | Key Loot | Hidden Quests |
|---|---|---|---|---|
| Underdark → Grymforge | 5-7 | Crafters, completionists, players who want the Adamantine Armor | Adamantine Armor, Mithral Ores, Grym's hammer weapon | The Myconid king quest, the Duergar slavers |
| Mountain Pass → Creche | 6-8 | Paladins, Lizardfolk lovers, players who want the Blood of Lathander | Blood of Lathander, Gloves of Hill Giant Strength, Gith crossbows | The Lathander puzzle, W'wargaz boss, the shadow curse hint |
Don't rush this. How hard Act 2 hits depends on whether you take one route (and miss gear) or both (and overlevel into a breeze). For a balanced run, hit the Underdark, clear Grymforge, then exit through the creche with the Blood of Lathander. You'll walk into Act 2 at level 7 with a full toolkit.
FAQ
Can I finish all Act 1 quests before the goblin raid?
Yeah. The goblin raid on the grove only triggers when you talk to Zevlor after dropping Minthara and Dror Ragzlin. You can explore, shop, and wrap up side content before flipping that final dialogue. Just don't long rest a bunch while the "Save the Grove" quest timer is active after the raid starts – that kills NPCs.
What is the best level to fight the goblin bosses?
Level 4 with a full party of four is comfortable. Level 5 is overkill and you'll steamroll them. Still level 3? Go knock out the Rescue the Gnome quest in the Blighted Village and lift the Idol of Silvanus for extra XP.
Where do I get the Adamantine Armor in Act 1?
Find the Adamantine Forge in Grymforge. You need two Mithral Ores – one near the acid area, another behind the forge. Drop the ore in the crucible, pick the Scale Mail mold, then fire up the forge hammer to craft it. Heavy armor makes Grym's fight trivial because it shaves his crit damage.
Should I enter Act 2 through the Underdark or the Mountain Pass?
Do both if you can. Order: Underdark → Grymforge → Mountain Pass → Creche → then exit through the creche's main gate. That squeezes out maximum XP and loot. If you have to pick one, take the Underdark for the Adamantine armor, but the Mountain Pass has the Blood of Lathander, which is better for Act 2's shadow zones.


